Creating an Agent
Agents are the AI team members that talk to your customers — over the phone, in a chat window, or both. This guide shows you where your agents live and how to create a new one in three steps.
The Agents page
Open Agents from the main menu. The page header reads Agents, with the subtitle Manage your AI voice agents.
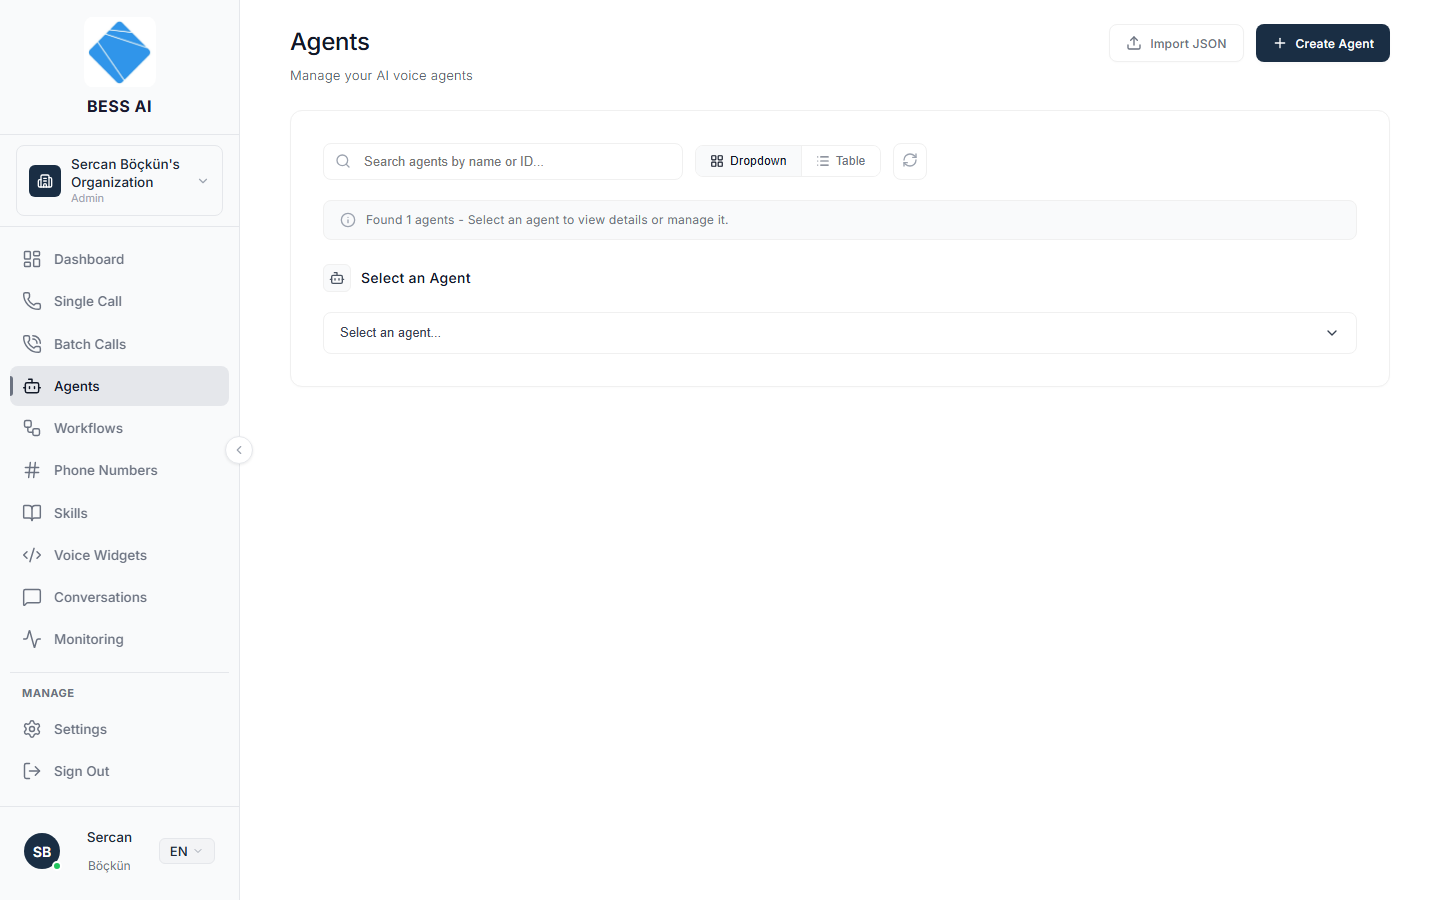
From here you can:
- Search. Type in the box labeled Search agents by name or ID… to find an agent quickly.
- Switch views. Use the Dropdown and Table toggle to change how the list is displayed. The table shows four columns: Name, ID, Type, and Status.
- Read the badges. The Status column shows a Published or Draft badge. The Type column shows a Realtime or Orchestration badge.
- Open an agent. Select any agent to open its configuration screen.
Two buttons sit at the top of the page: Import JSON and Create Agent.
Create a new agent
Click Create Agent. A short wizard walks you through three steps.
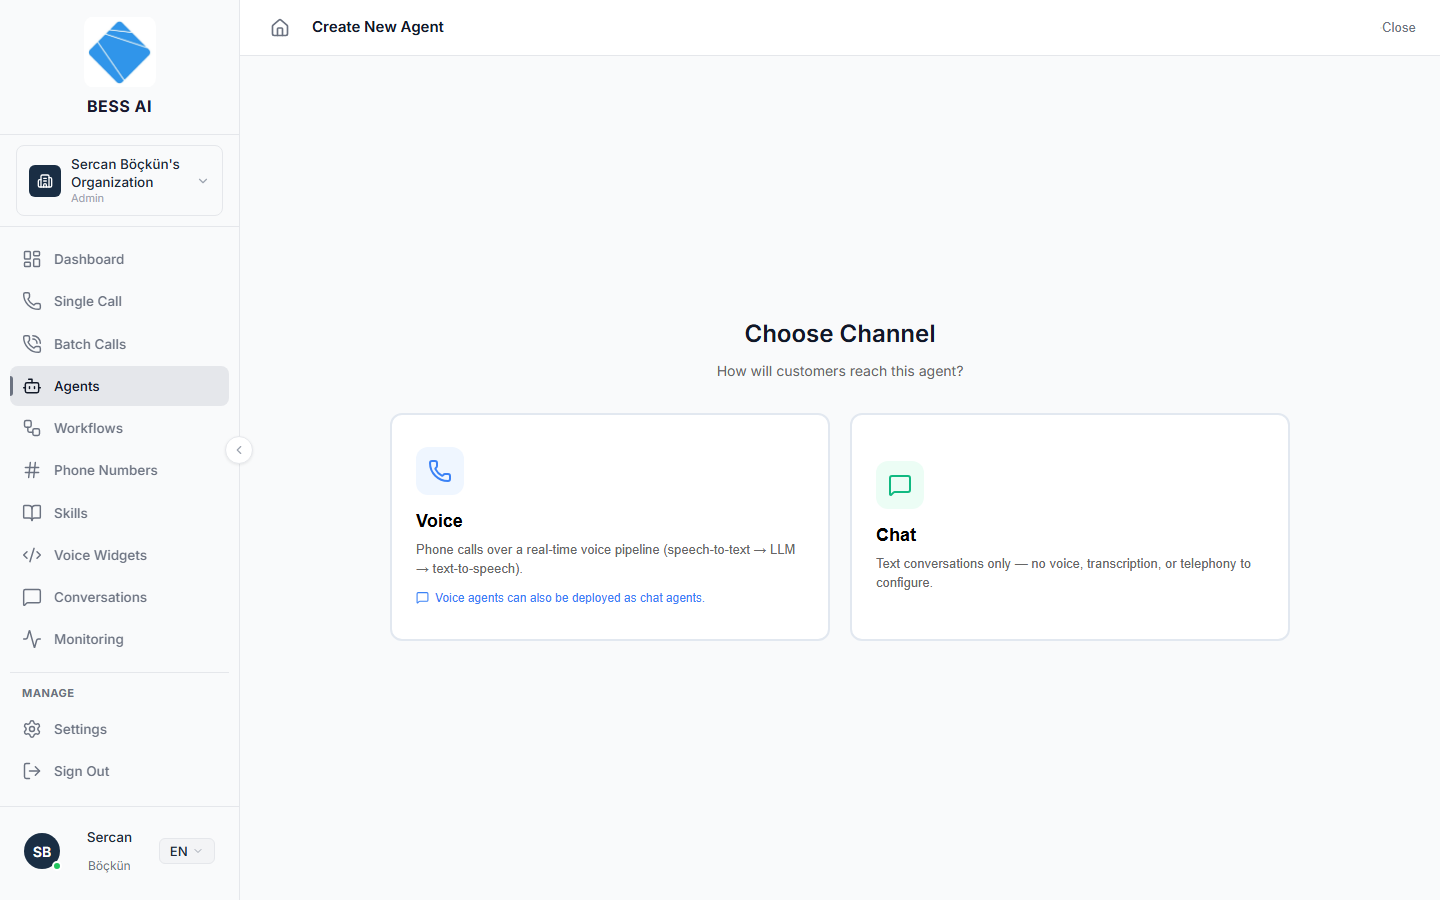
Step 1 — Choose Channel
The wizard asks How will customers reach this agent? Pick one:
- Voice — "Phone calls over a real-time voice pipeline (speech-to-text → LLM → text-to-speech)."
- Chat — "Text conversations only — no voice, transcription, or telephony to configure."
The Voice option notes that "Voice agents can also be deployed as chat agents." If you might want both channels later, start with Voice — you can enable chat afterward. A Chat agent stays text-only.
Step 2 — Choose Agent Type
For voice agents, choose how the agent thinks:
- Single Prompt — the agent follows one set of written instructions for the whole conversation. The right choice for most use cases.
- Conversation Flow — the agent moves through a visual map of steps that you design. Best for structured processes like appointment booking or collections. See Conversation Flows.
If you picked Chat in step 1, the wizard skips this step. Chat agents are always Single Prompt.
Step 3 — Configure your agent
The wizard then opens the configuration screen, where you name the agent, write its instructions, and pick its voice and model. See Configuring Your Agent for the full tour.
Two things will block you from finishing:
- The agent must have a name. Without one, you will see the message Please enter an agent name.
- A Conversation Flow agent needs at least one state in its flow before it can be created.
Import and export agents
You can move an agent's complete setup in and out of the platform as a file:
- Import JSON, on the Agents page, creates a new agent from a previously exported file. Use it to copy an agent between accounts or restore a backup.
- Export as JSON, an icon on the agent's configuration screen, downloads the agent's setup as a file.
A newly created or imported agent starts as a Draft. It cannot take calls or chats, be assigned to a phone number, or power a widget until you click Publish. See Testing & Publishing.
Next steps
- Configure your agent — prompt, greeting, voice, model, and call behavior.
- Add tools, skills, and MCPs — let the agent transfer calls, look up information, and more.
- Test and publish — try the agent live, then make it available to customers.