Testing & Publishing
Before your agent talks to a single customer, you can talk to it yourself — right from the configuration screen. This page covers the test panel, the crucial difference between Save and Publish, and the version, export, and delete controls.
The test panel
The right-hand pane of the agent configuration screen is a live test panel with two tabs: Voice and Chat.
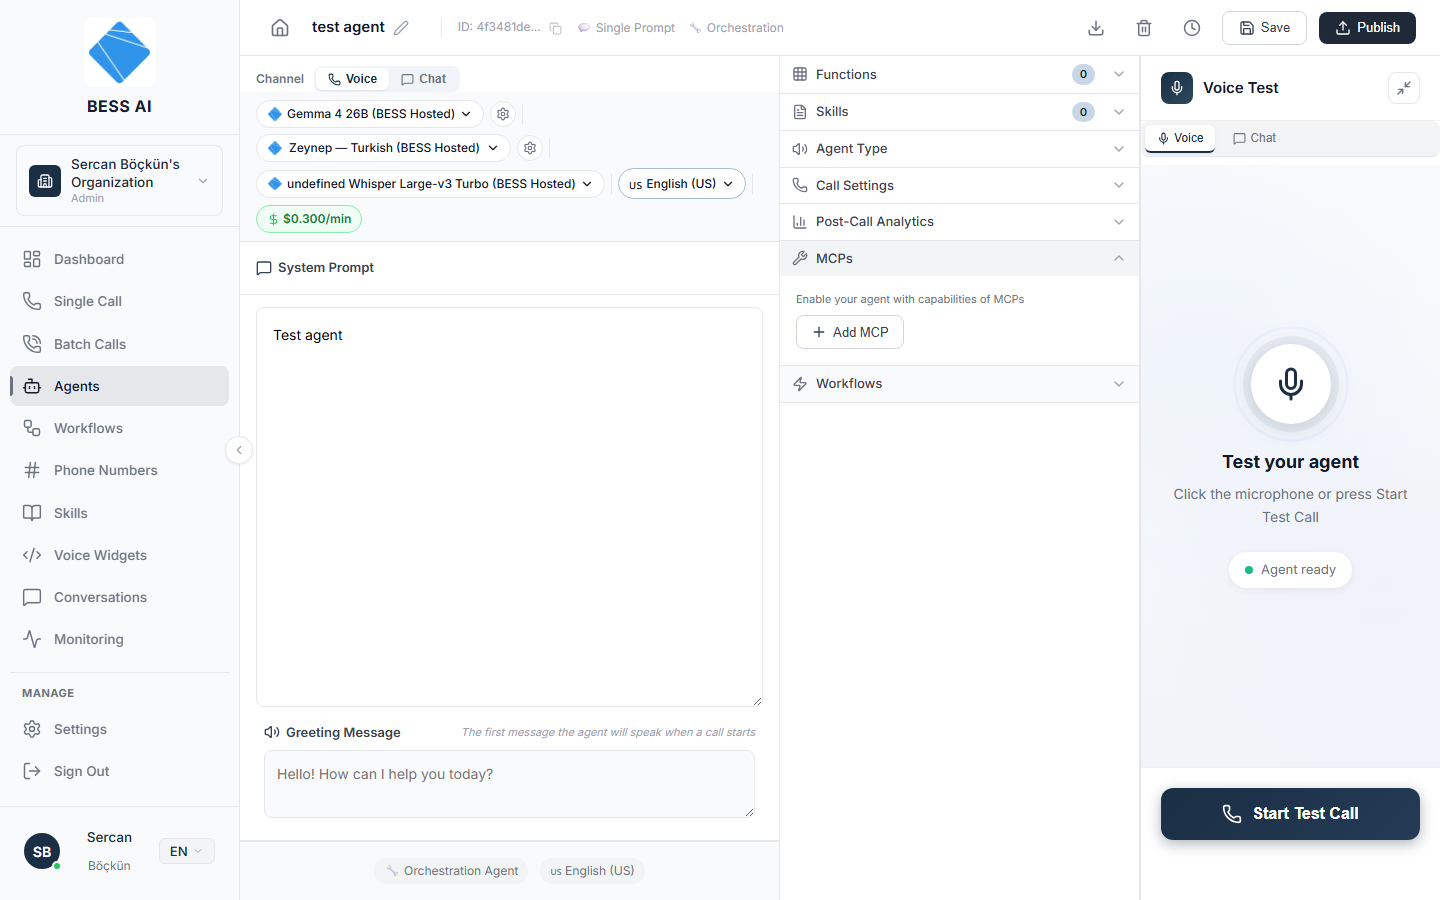
Run a voice test
- Open the Voice tab.
- Click Start Test Call. Your browser connects you to the agent — allow microphone access if asked.
- Talk to the agent as a customer would. A live transcript of the conversation appears as you speak.
- Click End Call when you are done.
Run a chat test
- Open the Chat tab.
- Click Start Chat Test.
- Type messages into the thread and read the agent's replies.
- Click Start New Chat to clear the thread and begin a fresh conversation.
The Chat tab is disabled for realtime agents — hovering over it shows the tooltip "Chat requires an orchestration agent". Switch the agent type to Orchestration if you want to test or deploy it over chat.
While you are still in the create wizard, the test buttons read Create Agent First. Finish creating the agent, then come back to test it.
Save vs. Publish — read this before going live
The two buttons in the top bar do very different things:
- Save stores your changes as a draft. Nothing changes for customers.
- Publish takes your saved configuration live.
Only a published agent can take calls, be assigned to a phone number, or power a widget. If you configured everything, clicked Save, and the agent still is not answering — this is almost always why. Click Publish.
A healthy routine:
- Make your changes and click Save.
- Run a voice or chat test from the test panel.
- Happy with the result? Click Publish.
Version History
Every publish creates a new version of your agent. Click the Version History icon in the top bar to review past versions, so you can see what changed over time and recover an earlier setup if a change did not work out.
Export a backup
The Export as JSON icon in the top bar downloads the agent's complete configuration as a file. Keep one before making big changes — you can restore it any time with Import JSON on the Agents page (see Creating an Agent).
Delete an agent
The Delete Agent icon in the top bar removes the agent permanently.
Deleting an agent cannot be undone. If the agent is assigned to a phone number or a widget, those will be left without an agent to answer. Export a JSON backup first, and reassign any phone numbers before deleting.
Pre-launch checklist
- The system prompt and Greeting Message are final.
- Tools are enabled and you have seen them work in a test call.
- Call settings feel right — the agent neither interrupts nor lags.
- You clicked Publish, and the badge on the Agents page shows Published.
- The agent is assigned where it should be — a phone number, a widget, or the chat API.