Settings
Manage your account, your team, and your organization's billing from one place.
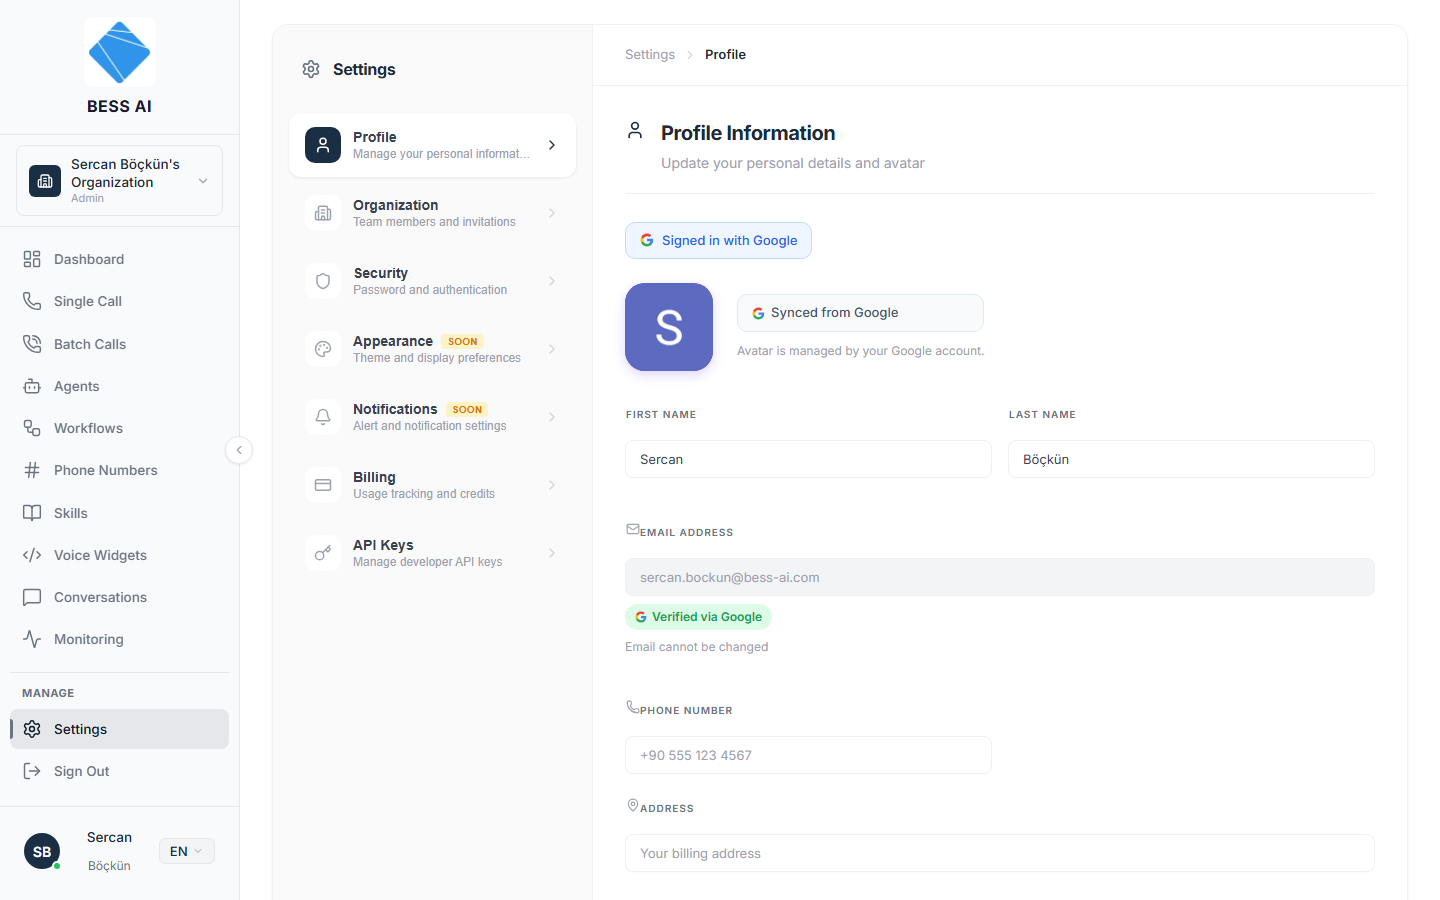
The Settings page has a left rail with these sections:
- Profile — "Manage your personal information"
- Organization — "Team members and invitations"
- Security — "Password and authentication"
- Appearance — marked Soon
- Notifications — marked Soon
- Billing — "Usage tracking and credits"
- API Keys — "Manage developer API keys"
Billing and API Keys are visible to organization ADMINS only. If you are not an admin, these sections show "Access Restricted" — ask an admin in your organization to make billing or API key changes.
Profile
Update your display name here. Your email address is shown but read-only — it is the address you signed up with and cannot be changed on this page.
Organization
This section shows your organization's info, including Your Role, Members, and Type.
- Pending Invitations — invitations sent to you appear here with Accept and Decline buttons.
- Invite Team Member — admins only. Enter a teammate's email to invite them.
- Members list — everyone currently in the organization and their roles.
- Sent Invitations — invitations your organization has sent that have not been accepted yet.
To invite a teammate:
- Open Organization in the left rail.
- Click Invite Team Member (you must be an admin).
- Enter their email address and send the invitation. It will appear under Sent Invitations until they accept.
Security
Change your password here.
If you signed in with a Google account, your password is managed by Google — the page notes this, and there is no BESS password to change.
Billing
The Billing & Usage section is your organization's financial overview.
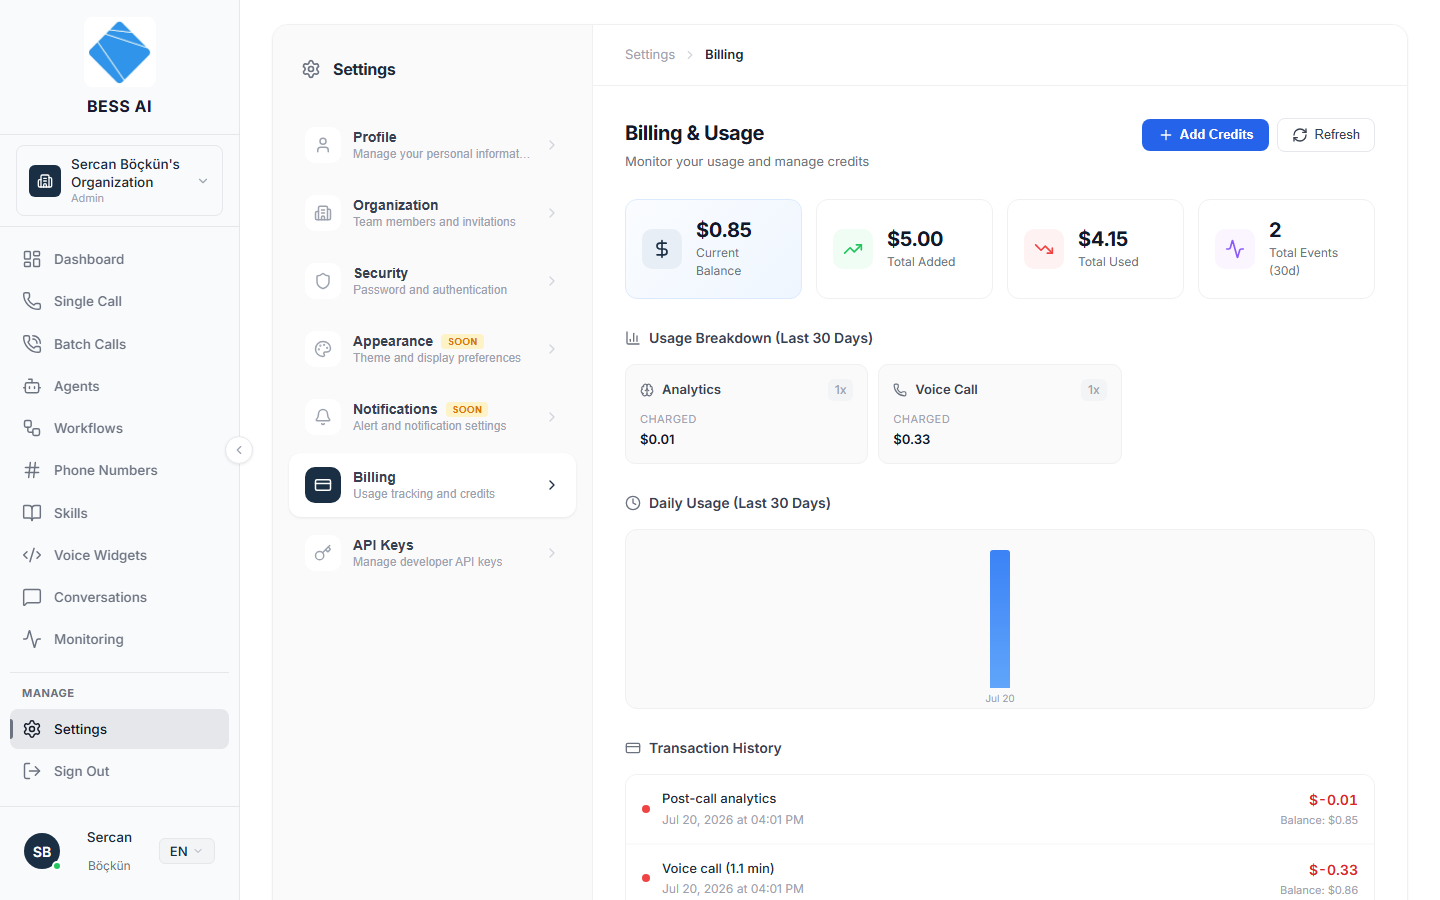
- Four cards summarize the essentials: Current Balance, Total Added, Total Used, and Total Events.
- Usage Breakdown shows where your credits go by category.
- Daily Usage shows spending day by day.
- Transaction History lists every credit purchase and charge.
To buy credits:
- Click Add Credits.
- Pick a package — $10, $25, $50, $100, or $250 — or enter a custom amount.
- Complete the payment through the PayTR checkout.
New accounts see a "🎁 Claim your $5 welcome bonus" banner. Verify your email address to claim the free credits.
API Keys
API keys let developers connect outside software to your BESS account. Admins only.
To create a key:
- Click Create API Key.
- Fill in the Key Name, choose Expires In and a Rate Limit Tier.
- Choose Permissions — pick specific scopes, or Full Access.
- Optionally add an IP Allowlist to restrict where the key can be used from.
- Create the key and copy it immediately.
The key is revealed only once. As the dialog says: "Copy this key now. You won't be able to see it again." Store it somewhere safe, such as a password manager.
Existing keys can be managed at any time:
- Rotate — issues a new key while the old one keeps working for a grace period, so you can update your integrations without downtime.
- Revoke — disables the key permanently.