Single Call
The Single Call page lets you place one outbound phone call with any of your published agents, straight from your browser.
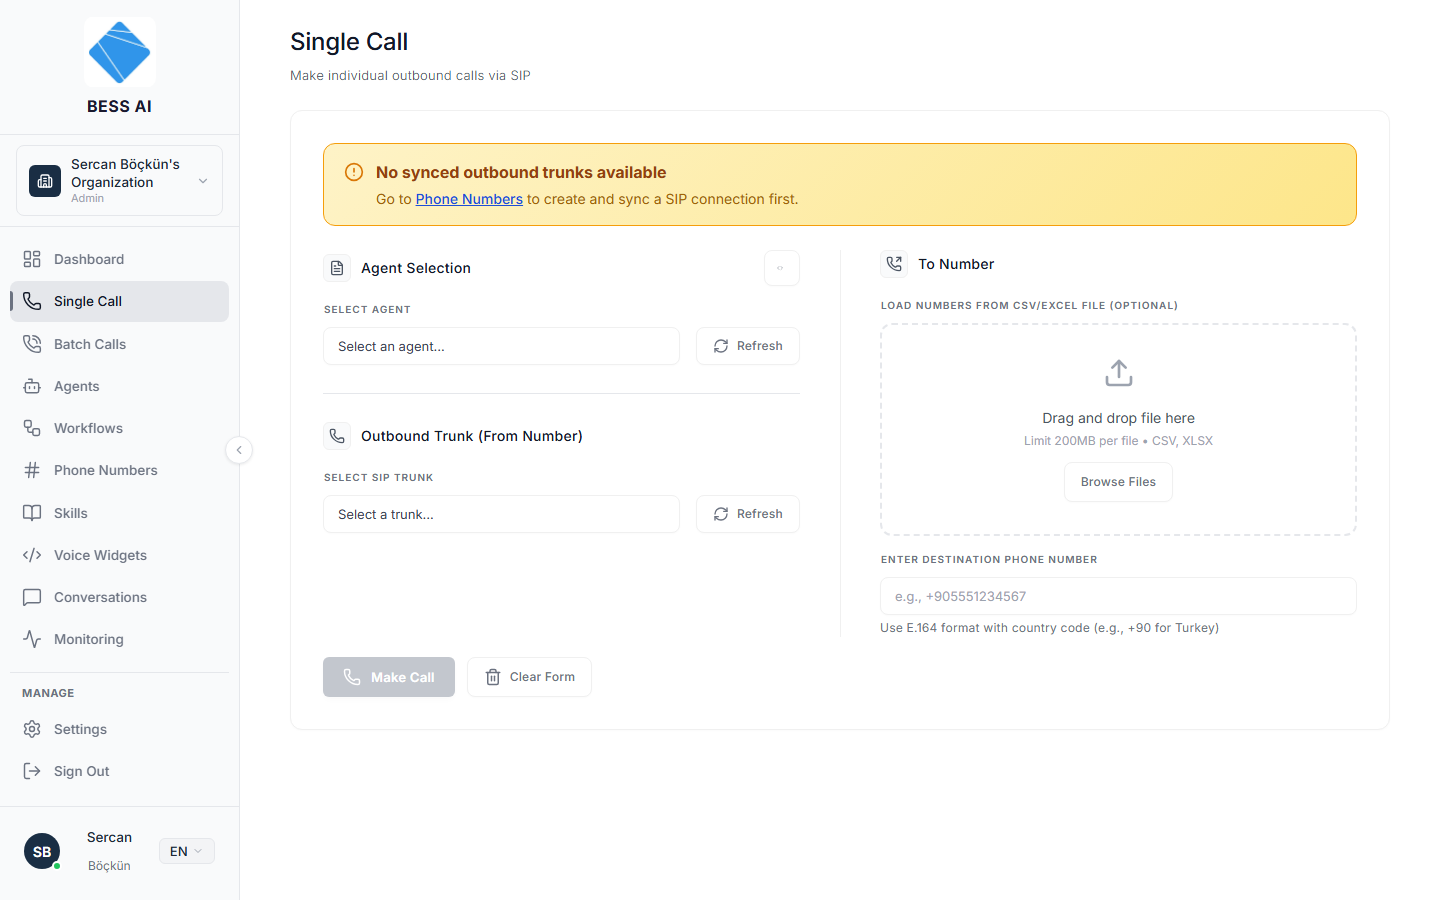
The page header reads Single Call with the subtitle Make individual outbound calls via SIP.
Before you start
You need two things:
- A published agent. Draft agents do not appear in the dropdown.
- A synced outbound SIP trunk. If you do not have one, a banner appears: No synced outbound trunks available, with the hint Go to Phone Numbers to create and sync a SIP connection first.
Making a call
1. Pick your agent
- In the Agent Selection section, open the Select Agent dropdown.
- Choose the agent that should handle the call. Only published agents are listed.
If your agent's prompt or greeting contains dynamic variables (placeholders such as a customer name), click the toggle with the curly-braces icon next to the agent selector. It opens the Dynamic Variables panel, which auto-detects every variable in the prompt and greeting and shows a value input for each. Fill them in so the agent speaks real values instead of placeholders.
2. Pick the From number
- In the Outbound Trunk (From Number) section, open Select SIP Trunk.
- Choose the trunk the call should come from. Trunks that are not synced yet appear disabled and cannot be selected.
3. Enter the To number
On the right side of the page, set the destination in one of two ways:
- Type it in. Enter the number in Enter destination phone number using international E.164 format, for example
+905551234567. - Upload a contact file. Drag a CSV or Excel file onto the dropzone (Drag and drop file here) or click Browse Files. Files up to 200MB are supported. After the upload, select one contact using the radio button next to their row.
The uploader auto-detects your phone column from common header names such as PHONE_NUMBER, Phone, Telefon, GSM, or mobile. Any extra columns in the file become dynamic variables for the selected contact — and they override any values you typed manually in the Dynamic Variables panel.
4. Place the call
- Click Make Call to dial.
- To start over instead, click Clear Form.
During the call
Once the call starts, an active-call card appears showing:
- The live status: Ringing, Connected, Ended, or Failed.
- The running duration.
- The From and To numbers.
- An End Call button to hang up at any time.
Troubleshooting
- The agent I want is not in the dropdown. Only published agents appear. Open the agent and publish it first.
- Banner: No synced outbound trunks available. You have no trunk ready for outbound calls. Go to the Phone Numbers page, add a SIP connection to your number, and sync it.
- My trunk is in the list but grayed out. It has not been synced yet. Sync it from the Phone Numbers page, then come back.
- The agent read a placeholder out loud. A dynamic variable was left empty. Open the Dynamic Variables panel and fill in every value, or include the values as columns in your uploaded file.
- The call shows Failed immediately. Check that the destination is in E.164 format (like
+905551234567) and that your trunk allows calls to that country.